HOW TO START A BLOG WITH BLUEHOST 5 EASY TIPS

HOW TO START A BLOG WITH BLUEHOST 5 EASY TIPS

Getting started with Bluehost- Let’s Go..

If you’re looking to start a website for blogging or a website for any of your needs business or personal. Bluehost is a great choice.

I personally am using Bluehost with WordPress and they have been great and make your website look very professional.

Bluehost is easy to navigate if you were just starting out, not to mention they have affordable prices to get you up and going and with some affiliate links, you can make that money back quite quickly and cover the costs of your website.

With Bluehost, you can start your own blog for as little as $2.95 a month. If you sign up on a longer plan such as 12 months or three-year plan you will get a cheaper price, I personally signed up for the three-year plan straight away as it saves you money in the long run.

The benefits of using Bluehost with your WordPress for your blog are:

Bluehost is affordable and you get to pick a free domain and word press is included in Bluehost. It’s super easy to use if you are just learning and starting Bluehost makes it easy tier use a WordPress blog.

Bluehost has an amazing support team, which I have used a few times and they are very prompt at fixing any issues that you may come across.

You will be self-hosted giving you the freedom you want with your blog and to monetize.

***This post contains affiliate links. If you make a purchase through clicking the link, we may earn a small commission at no additional cost to you.***

 There are many different web hosting businesses, but Bluehost in my opinion is one of the best you can use, it is so easy to use and offers great Technical Support.

Blogging can be one of the best ways you can earn money by using affiliate links within your website and you can join most affiliate programs for free.

Setting yourself up to run a successful blogging website can get you earning a very lucrative income and will give you the opportunity to work from home and travel whenever you want, it gives you complete flexibility to make your own schedule and so much more.

You will be very surprised at how much you can start loving life when you set yourself up to earn a living or from the comfort of your home or anywhere that you choose to be around the world.

Anyone can make money online and especially with a blog and it is easier to create a website than you think, being a nurse by trade when it comes to techy things, I have no idea but found that using Bluehost made the process super easy.

Tips to help you get on your way to blogging!

1. Think about and register your domain name.

You will need to think about what your domain name will be, a domain name is what people search on the internet, for example, mine is “suitcasesandserenity.com” this can be a hard choice as you might have many ideas.

Keep in mind when picking a domain name not to choose something that might be hard for people to spell otherwise you will be forever trying to explain the correct way your domain name is. 

Have a few different options in mind, because the one you choose may be taken already, so, don’t get discouraged, have some backup ideas.

2. Select the provider for web hosting and your domain

As mentioned, I recommend Bluehost for many reasons, below are just a few.

Easy to use – Bluehost is user-friendly and the interface has been designed to make it simple for newcomers, installing WordPress, and so many other plugins make designing your website a breeze and not to mention making it look professional.

Using Bluehost you can get your domain and web hosting together, which saves a lot of confusion.

Amazing support – I have needed help with my website on a few occasions, and have been happy with their support team every single time, I jump on their chat and they walk me through it, if I cant fix it, they do it for me. The process is so easy and such peace of mind.

Great rates – Bluehost has amazing rates on offer and different plans to suit each budget and does not have much downtime or glitches like some of the other web hosting options. 

If you choose to buy the 12 months or 36-month plan you will get a much lower price for the longer you buy, I bought it straight away with a 36-month plan saving me money on my website in the long run and not having to worry about renewing it.

A step-by-step guide to getting you started with Bluehost.

You will arrive on the home page of Bluehost, start your journey by clicking on the get started now button

How to start a blog

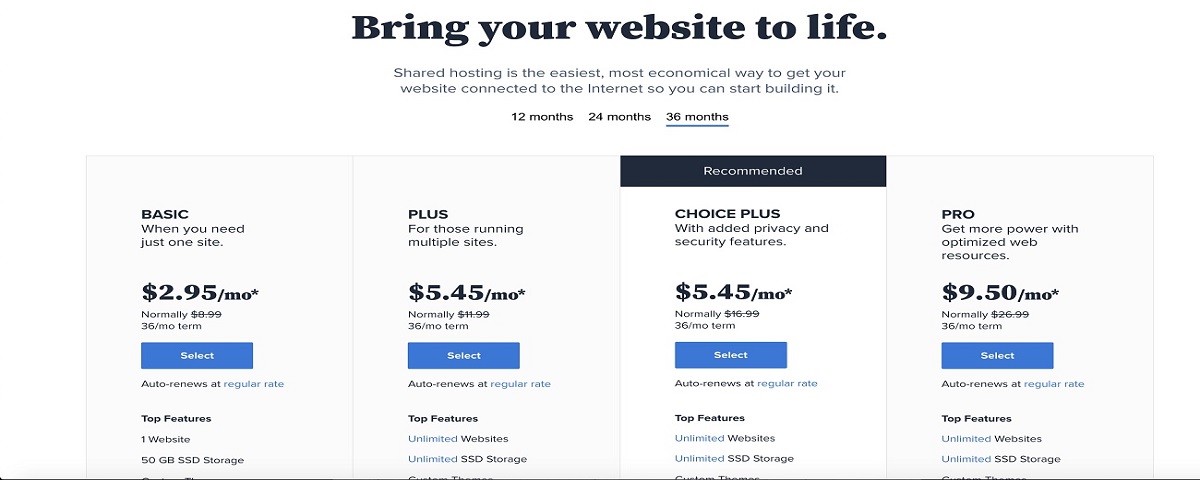
Select the package

Select a package that best suits your needs, as they all have different options depending on what you require for your website, I use the basic package and that suits the needs for my website, as mentioned earlier, I recommend buying in with the 36-month plan, as it saves you money in the long run and avoids the hassle of having to renew every year.
 

How to start a blog

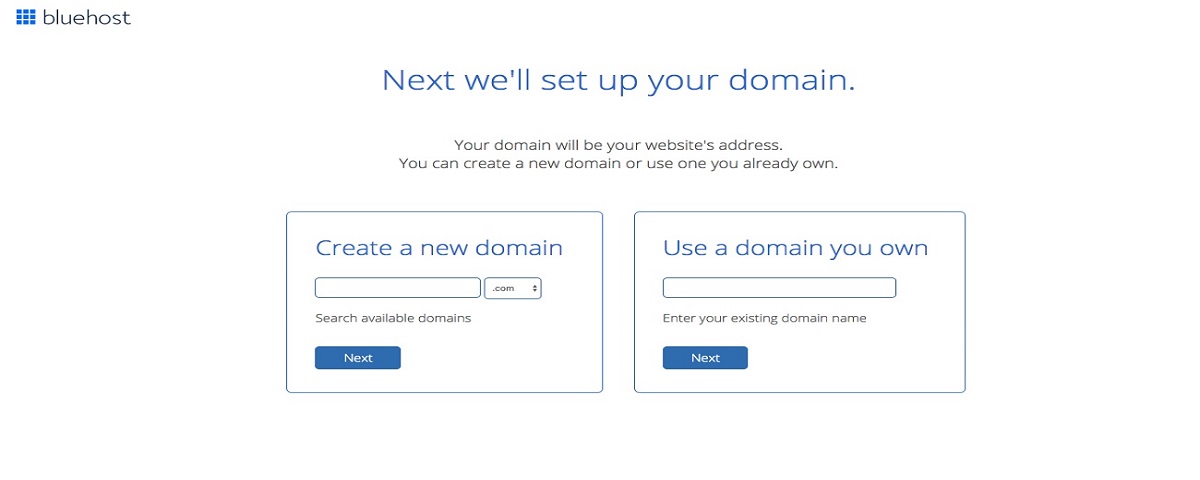
Remember when I said to start thinking about a domain name to call your website, you have now arrived at the place you get to select your “new domain name” type in your ideal domain name or use a domain name you may already have. 

**Don’t be disappointed if that ideal domain name is taken, tweak it or have another up your sleeve to use.
 

How to start a blog

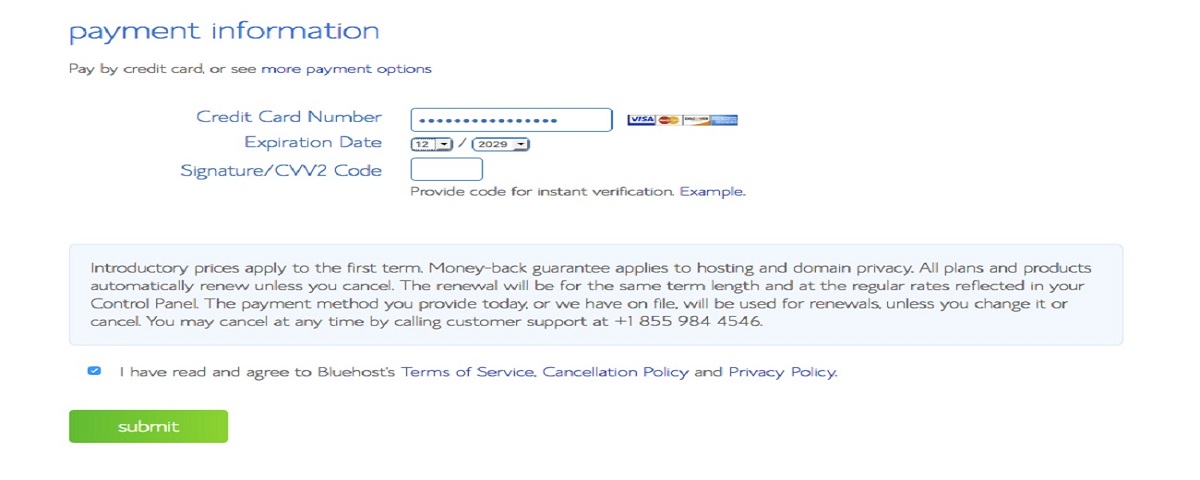
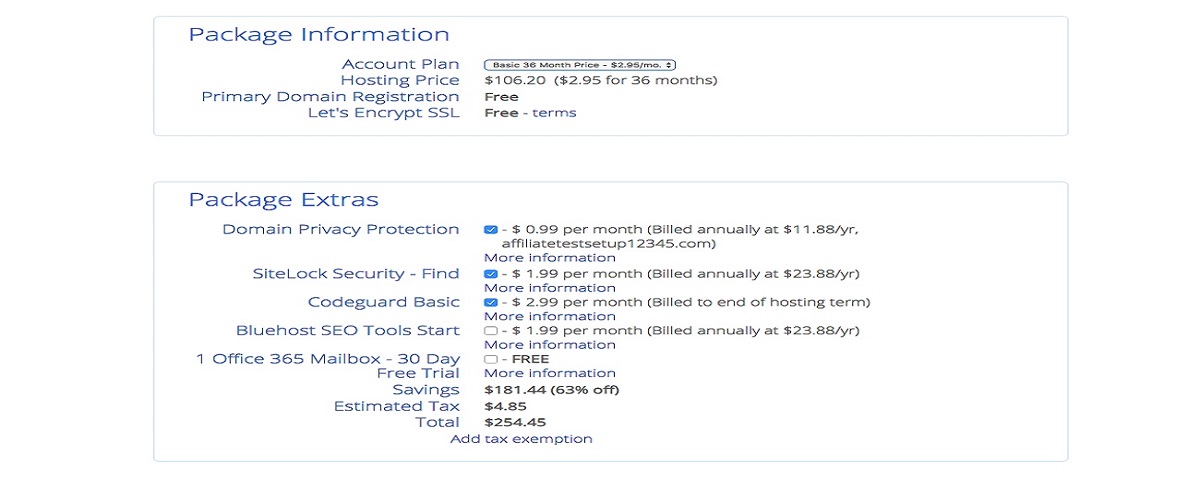
Fill in your personal information

Fill in your personal information and make sure your correct package is selected, I recommend having the domain privacy protection selected, for minimal cost, it is worth it to keep your personal details hidden.

You can untick any others, but have a read and choose what options you like, if you have any questions, reach out to the Bluehost team they have a great support team.

How to start a blog
How to start a blog
How to start a blog

Getting WordPress installed. 

Bluehost makes it extremely easy to install WordPress and easy to create your web design. 

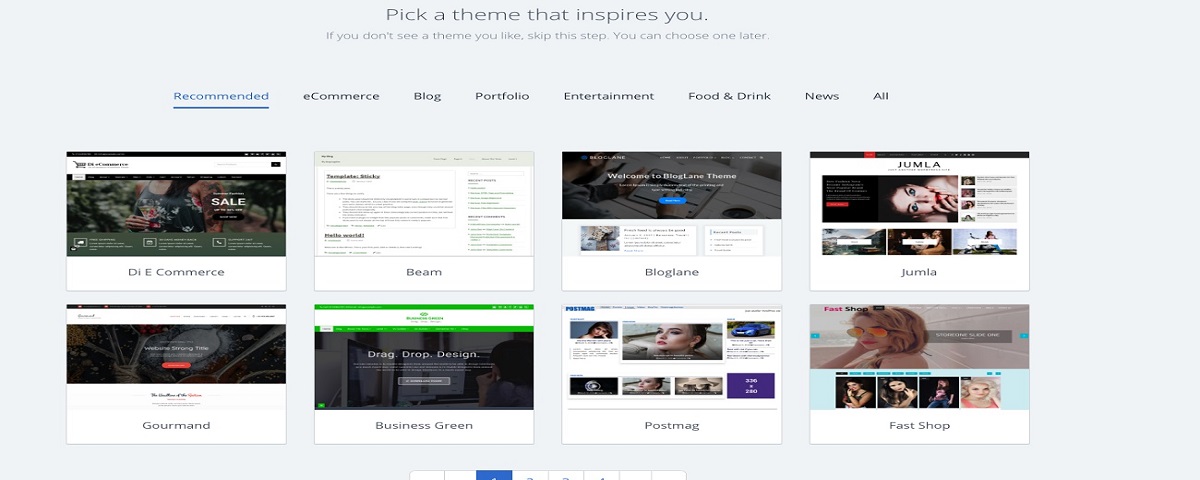
Bluehost will have you select a Theme, pick the theme you like best, but don’t worry too much as you can change this at any time by loading another theme, there are many free themes or paid theme options. 

I have a paid Elegant theme (Divi) on my website but don’t worry you can just use a free one if you choose. 

Click “start building” and when prompted you can select either “personal or business”  and you are on your way!
 

How to start a blog

CELEBRATION TIME!!  You did it! WOOHOO…

On the left-hand side in Bluehost is the dashboard menu, familiarise yourself with this menu, it will be your next best friend. 

Below I will share with you some basic steps that will help you get started in creating your wonderland! 

If you need any help, reach out to Bluehost, and they will walk you through anything you need or simply be able to do it for you! 

Happy Creating! 
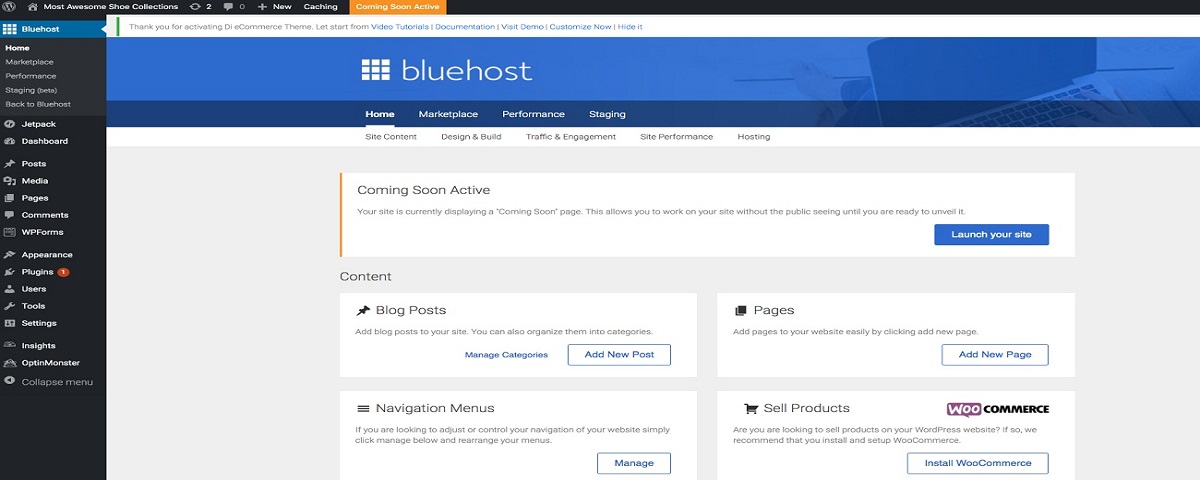
How to start a blog

Here are a few tips to help you navigate using the Bluehost dashboard. 

  • Posts are where you will write your content, your blog posts, all you need to do is click “Add new” and start creating. Under “posts” you can create “categories” & “tags” that can help organize your posts. Categories could be anything you decide, for example, you could have “travel tips” “blogging” “recipes”, etc.
  •  Media is where you will upload and find your pictures, videos, and PDFs.
  • Pages are more of a static page where not much changes, it is like a landing page for your posts to go on, or pages “your About” page and your “contact” page
  • Appearance is where you will find the “Themes” and where you can create your website’s brand, like the color scheme, fonts, headers, footers, you can also create your menus and sub-menus & widgets.
  • Plugins are where you can put add-ons to help your website function more effectively and allows creativity, there are so many different plugins available, depending on what your niche is, will determine what plugins you require. For example, for recipes I use “WP recipe maker”, there are endless choices available for you!
  • Settings are where you can change your login details, you can also select how many posts to show on your home page, etc, have a look through all the options in your dashboard and get familiar to help you with your needs.


Making Money with your blog

 If you are feeling inspired and ready to get started with blogging, there are many different ways you can monetize your blog and earn a passive income from it. You can see my post about 4 ways to make money with your blog. 


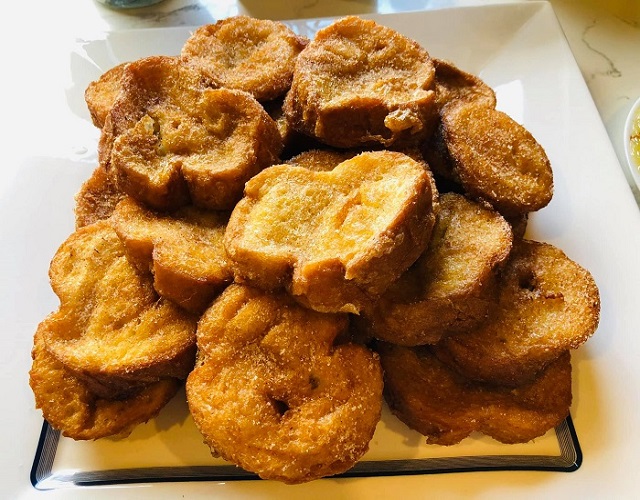
Amazing Rabanadas (Portuguese French toast) Easy how to steps

Amazing Rabanadas (Portuguese French toast) Easy how to steps

Tasty Rabanadas

A taste of Portuguese goodness. I am excited to share with you a beloved classic straight from the sun-kissed coastlines of Portugal – Rabanadas, a delightful spin on the traditional French toast.

This indulgent treat, also known as Portuguese-style French bread, holds a special place in my kitchen, inspired by my husband’s roots and our shared love for recreating time-honored family recipes. Rabanadas are not only a testament to the rich culinary tapestry of Portugal but are also a celebration of the simple joys that come together at the table.

Rabanadas will not disappoint. Join me as we step into the culinary heart of Portugal and learn how to make this delightfully simple dish.

Be sure to check out my other Portuguese and other favorite recipes here.

Rabanadas – Portuguese style French bread

A delicious s quick and easy snack or as a dessert for any time of the year.
Prep Time 10 minutes
Cook Time 20 minutes
Total Time 30 minutes
Course Dessert, Snack
Cuisine Portuguese
Servings 5
Calories 682 kcal

Ingredients
  

  • 1 French Bread Stick (day or 2 old to be drier)
  • 4 Cups Milk
  • ½ Cup Sugar
  • 1-2 Cinnamon sticks
  • half Lemon Peel
  • 4 Eggs (Beaten)

Cinnamon Sugar Mix

  • 1 Cup Sugar
  • 2-3 Tbsp Cinnamon

Instructions
 

  • In a medium pot, over medium heat, Bring to Boil milk, cinnamon, sugar, and lemon peel and then simmer for 1-2 minutes until the sugar has dissolved. Remove from heat and let cool slightly and remove cinnamon sticks.
  • Beat eggs together in a medium bowl until well combined.
  • Dip bread slices one at a time, into milk mixture, and then into the eggs, turning to coat the whole slice of bread.
  • Heat oil in a large pan over medium heat, ensuring enough oil to come ½ up the edge of the pan, Fry soaked bread on each side approx 2 minutes on each side, until golden.
  • Place on paper towel to remove excess oil, coat both sides of the cooked Rabanadas in cinnamon sugar immediately.

To make the Cinnamon Sugar

  • Mix the cinnamon and sugar together, coast over both sides of the cooked Rabanadas.
  • Enjoy Hot or cold.

Notes

Tip: Slice breadstick the day before to dry out a little bit, making it slightly stale.
Cut breadstick into slices about 3cm thick, you can switch the milk and use water or port wine or wine.
For extra sweetness, you can drizzle some honey on top and serve. 

Pin it!

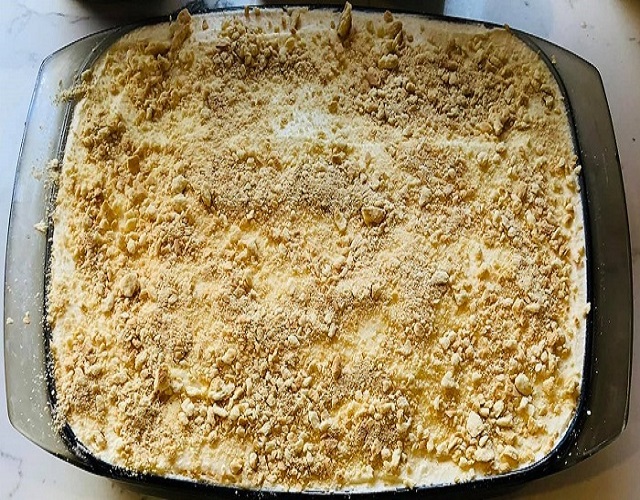
Bolo De Bolacha- Portuguese Biscuit Cake, Easy to Make

Bolo De Bolacha- Portuguese Biscuit Cake, Easy to Make

The Yummy Bola De Bolacha


It’s no secret that the Portuguese have some of the best food in the world. From their seafood to their desserts, there is something for everyone to enjoy. And one of my favorite Portuguese desserts is Bolo De Bolacha. These desserts are not only delicious but also quick and easy to make. So if you’re looking for a dessert that will wow your taste buds, look no further than Bolo De Bolacha, this is a recipe you don’t want to miss saving.

Be sure to check out my other Portuguese and other favorite recipes here.


Bolo De Bolacha - Biscuit Cake

Coffee Biscuit cake is easy to make, no-bake cake, and barely any rest time that you can enjoy soon after being made.
Made with Maria biscuits dipped in coffee and cream.
Made with a twist to the original recipe.
Prep Time 30 minutes
Total Time 30 minutes
Course Dessert
Cuisine Portuguese
Servings 10
Calories 360 kcal

Ingredients
  

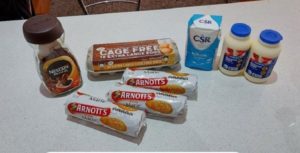
  • 2 packets Maria Biscuits (depending on the size of dessert)
  • 600 ml Thickened Cream
  • 4 Eggs - Separated into whites and yolks
  • ¼ cup Sugar - 4 Tbsp for egg whites, 2 Tbsp for cream
  • 1 ¼ cup coffee with water (made to your taste) pour into a bowl
  • Crushed maria biscuits to decorate

Soft Eggs

  • 4 Egg Yolks
  • 7 Tbsp Water
  • 6 Tbsp Sugar

Instructions
 

  • In a small bowl make coffee and allow to cool slightly (coffee Made to individual taste)
  • Whip egg whites with adding x4 spoons of sugar in a bowl and mix until stiff peak forms.
  • Whip cream in a bowl with x2 sugar to sweeten, beat until stiff (whipped cream)
  • Combine whipped egg whites and cream together
  • To assemble: Smear a little of the cream mixture on the base of the dish or serving platter you are going to use.
    Dip biscuits in coffee and place them on the layer of cream in the dish you are using.
  • Spread a cream layer over the biscuits and another layer of biscuits.
  • Repeat steps 4 & 5, (layer coffee dipped biscuits, then cream, biscuits, cream, so on) you can break biscuits to fill the spaces if you like.
  • Saving some of the cream mixture, finish the biscuit layer with cream on top, before adding the “soft egg” on top and then finishing off with the cream mixture on the very top.

To Make Soft Eggs

  • In a small pot, add the 7x spoons of water and 6x spoons of sugar, bring to a boil over medium heat, let cool
  • Add eggs yolks and mix well, bring to the boil again continually mixing. The mixture will start to thicken, if you think it is too thick, you can add a little extra water. Let it cool.
  • Add the “soft egg” mixture to the top of the whipped cream layer, spread evenly. Finish with the remaining cream mixture.
  • Refrigerate for 1 hour and Place crushed biscuits to decorate when ready to serve dessert.

Notes

You can make the dessert by making it on a platter/ plate or in a dish, depending on the look you would like to serve it. 
You can add as much or as little sugar as you like. 
 

Pin it!

Broken Glass Jelly Dessert- Delicious, Simple & Easy to Make

Broken Glass Jelly Dessert- Delicious, Simple & Easy to Make

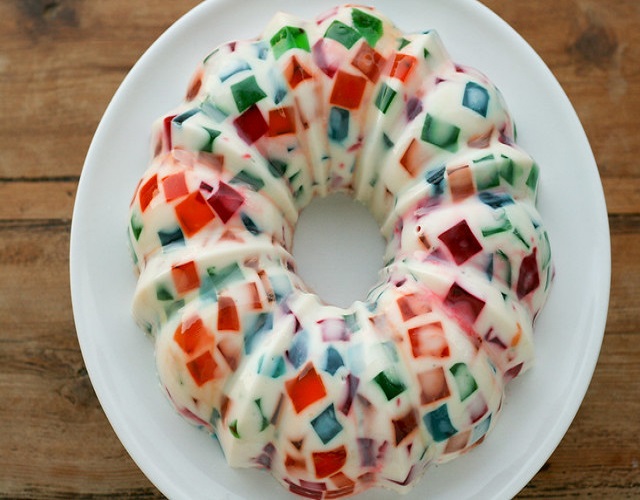
Craving something sweet, colorful, and a little out of the ordinary? then the mesmerizing slices of our Broken Glass Jelly Dessert! This recipe not only gives you a vibrant visual feast but is a surefire conversation starter for any gathering.

Loved by kids and adults alike, this colorful dessert takes simple ingredients and transforms them into a stunning mosaic of jewel-toned cubes, in a dreamy creamy base. It’s perfect for those who want to dip their toes into the art of dessert-making without tackling overly complicated pastries. Whether you’re hosting a party, family dinner, or just want to brighten your weekend, the Broken Glass Jelly Dessert promises sweet satisfaction wrapped in an eye-catching package. Prepare to dazzle your guests and treat your taste buds with this unique and cheerful delight!

Be sure to check out my other favorite recipes here.

rainbow

Broken Glass Jello

Sweet, Soft, and creamy gelatin dessert, Quick and Easy to make with little ingredients.
Prep Time 30 minutes
Total Time 5 hours
Course Dessert
Cuisine Filipino
Servings 20
Calories 138 kcal

Ingredients
  

Colored Jelly

  • 3 or 4 Boxes Colored gelatin (jelly) (red, green, blue, yellow)
  • 1 Cup Boiling water
  • Cup Coldwater

Creamy Jelly

  • 3 Packets Colorless unflavored gelatin 
  • ½ Cup Coldwater
  • 1 Cup Boiling water
  • 1 Can Condensed milk
  • 1 ¼ cups Whipping cream

Instructions
 

  • Make colored jelly with 1 cup boiling water and 1/3 cup cold water to each flavor jelly you use.
    Refrigerate the jelly overnight or until set.
  • Once the jello is set, cut it into chunks and set it aside.
  • In a bowl, put the 3 packets of unflavored/ clear gelatin, Pour in ½ cup of cold water and wait about 2 minutes.
  • Add in the 1 cup of boiling water and stir constantly until gelatin is dissolved
  • Add the 1 can condense milk and cream.
  • Lightly grease tin/mold you will use. (this will help it come out easy)
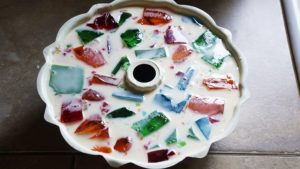
    Place the colored jelly chunks into the mold/tin.
    Pour the milk mixture into mold/tin over the sliced colored jelly.
    Refrigerate until set.

Notes

An easy-to-make dessert to take to any party with little mess. 
  • Decide how many flavors of colored jelly (gelatin) you want to use, you can use 3-4 flavors: I like to use- strawberry, orange, lime, and berry. You can use more, depends on how many colors you want through the dessert.
  • You can add 1/2 cup of pineapple juice if you like to add flavor. 
  • To get the dessert out of the mold, Dip the mold into warm water for a few seconds or wrap a warm cloth around the mold. 
  • Flip the mold onto a serving plate and eat cold.

Pin it!

Queijadas De Leite, Portuguese Milk Tart. Easy Make Recipe

Queijadas De Leite, Portuguese Milk Tart. Easy Make Recipe

Queijadas De Leite – Portuguese milk tarts

Eating dessert is one of life’s simple pleasures. There’s nothing like a delicious, sweet treat to cap off a meal or to just enjoy on its own. If you’re looking for a new dessert to try, why not give Queijadas De Leitea go? These Portuguese milk tart desserts are easy to make and delicious! Plus, they’re perfect for any occasion – from birthdays to holidays.

Keep reading for the easy 4-step recipe and instructions!

Be sure to check out my other Portuguese and other favorite recipes here.


Portuguese tarts

Queijadinhas - Portuguese Milk Tart

A traditional Portuguese dessert in 3 simple steps.
Delicious, quick, and easy Portuguese Milk Tart, Queijadas de Leite.
A recipe the whole family will love and is sure to impress.
it's impossible to stop at one.
Prep Time 10 minutes
Cook Time 35 minutes
Total Time 45 minutes
Course Dessert
Servings 24

Ingredients
  

  • 4 Eggs
  • 1 ¾ Cups Sugar
  • 1 ½ Cups Plain Flour
  • 1 Lemon Zest
  • 1 Litre Milk
  • 100 Grams Butter

Instructions
 

  • Preheat oven 180° degrees
  • Combine butter & milk in a medium heatproof pot, over medium heat until butter is melted. (wet ingredients
  • In a bowl, combine eggs, sugar, flour, & lemon zest, mix together until combined, add wet ingredients to dry ingredients, mix until smooth
  • Spray cupcake tin with oil, pour the mixture into the cupcake tines, filling ¾ full. Bake in preheated oven for 35 minutes until golden brown.
    Serve hot or cold.

Notes

A great quick-to-make dessert to take to any party with little mess. 
Tips
If you don't like lemon, you can replace it with orange, or vanilla, or any flavor you like. 
You can add cupcake cases and pour the mixture into the cases or into the tin directly. I personally put it in the tin directly. While tarts are still hot, use a knife and go around the edges to get them out of the tin and cool on a rack. 
You can decorate the tarts with coconut or icing sugar to serve. 

Pin it!